In today’s fast-paced, busy world, stress has become an inevitable part of our lives. It’s important to find healthy ways to cope with stress and take some time for yourself. A simple yet effective solution is a stress ball. What’s better than making it at home? In this blog, we’ll guide you through the process of making a homemade stress ball that can provide you with instant relaxation when you need it.
Benefits of using a stress ball:
Before we get into the steps of making a stress ball, let’s discuss some of the benefits it offers. Using a stress ball can help relieve tension, improve concentration, and even build hand strength. The repetitive squeezing motion stimulates blood flow, releases endorphins, and helps create an overall sense of well-being. With a homemade stress ball, you have complete control over the materials and customization, making it more meaningful.
materials needed:
1. Balloons: Choose balloons that are vibrant and stretchy that can hold your desired fill volume. It is recommended to prepare some extra just in case.
2. Filling options: You can choose from a variety of filling materials. Some popular options include:
A. Flour or cornstarch: Easy-to-use options that provide a soft and moldable texture.
b. Rice: Provides a more solid feel and soft rustling sound for extra auditory relaxation.
C. Sand or Salt: Provides a denser, more intense sensation, perfect for those looking for a stronger stress-reducing experience.
d. Water beads: Tiny colored beads that absorb moisture. When used as fillers, they create a soft sensory experience.
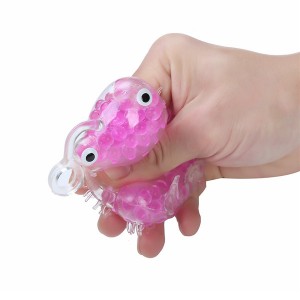
e. Orbeez: Similar to water beads, Orbeez is a popular choice for stress balls because of its gel-like texture and visual appeal.
Step-by-step guide:
Now, let’s follow these simple steps to create your own homemade stress ball:
Step 1: Gather all the above materials and set up your workspace. It is recommended to put down some old newspapers or trays to avoid clutter.
Step 2: Start by stretching the balloon a few times to make it more pliable. This will prevent it from cracking during filling.
Step 3: If you are using a filling such as flour, cornstarch, or rice, attach a funnel to the opening of the balloon to make it easier to pour the filling into it. For denser materials like sand or salt, use a spoon.
Step 4: Gradually pour the filling into the balloon, making sure not to overfill it. Leave plenty of room at the top for expansion and easy squeezing.
Step 5: After pouring the desired amount of filling, gently squeeze the excess air out of the balloon and tie a knot at the opening. Make sure it is securely fastened.
Step 6: Gently squeeze the pressure ball to check if the filling is evenly distributed. If necessary, adjust filling amount.
Step 7: At this point, you may choose to further decorate your stress ball. Use markers or paint to give it a personalized touch. Let your creativity shine!
Congratulations! You have successfully created your own homemade stress ball. This simple yet therapeutic tool will help you reduce stress, improve focus, and promote a sense of calm when you need it most. Experiment with different filling options and balloon colors to find the perfect combination for your desired experience. Remember, self-care is crucial and taking a few minutes to relieve stress can have a big impact on your overall health.
Post time: Nov-23-2023